

Imagine unlocking doors, safes, or secret compartments with just your fingerprint! In this step-by-step guide, you’ll learn how to build a fingerprint-activated lock system using Arduino and the R307 biometric sensor. In this tutorial we are going to learn how to record or register fingerprints with Arduino and then read them with the biometric sensor and activate a lock.
Components You’ll Need
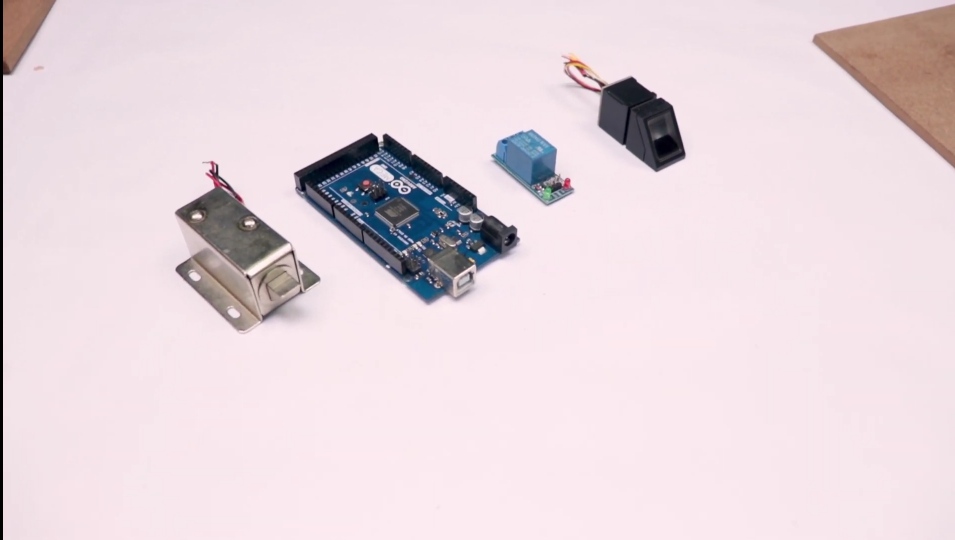
- Arduino Uno/Nano
- R307 Optical Fingerprint Sensor
- Relay Module
- Solenoid Lock
- MDF Wood (for mounting)
- Jumper Wires
- Power Supply (5V for Arduino, 12V for solenoid)
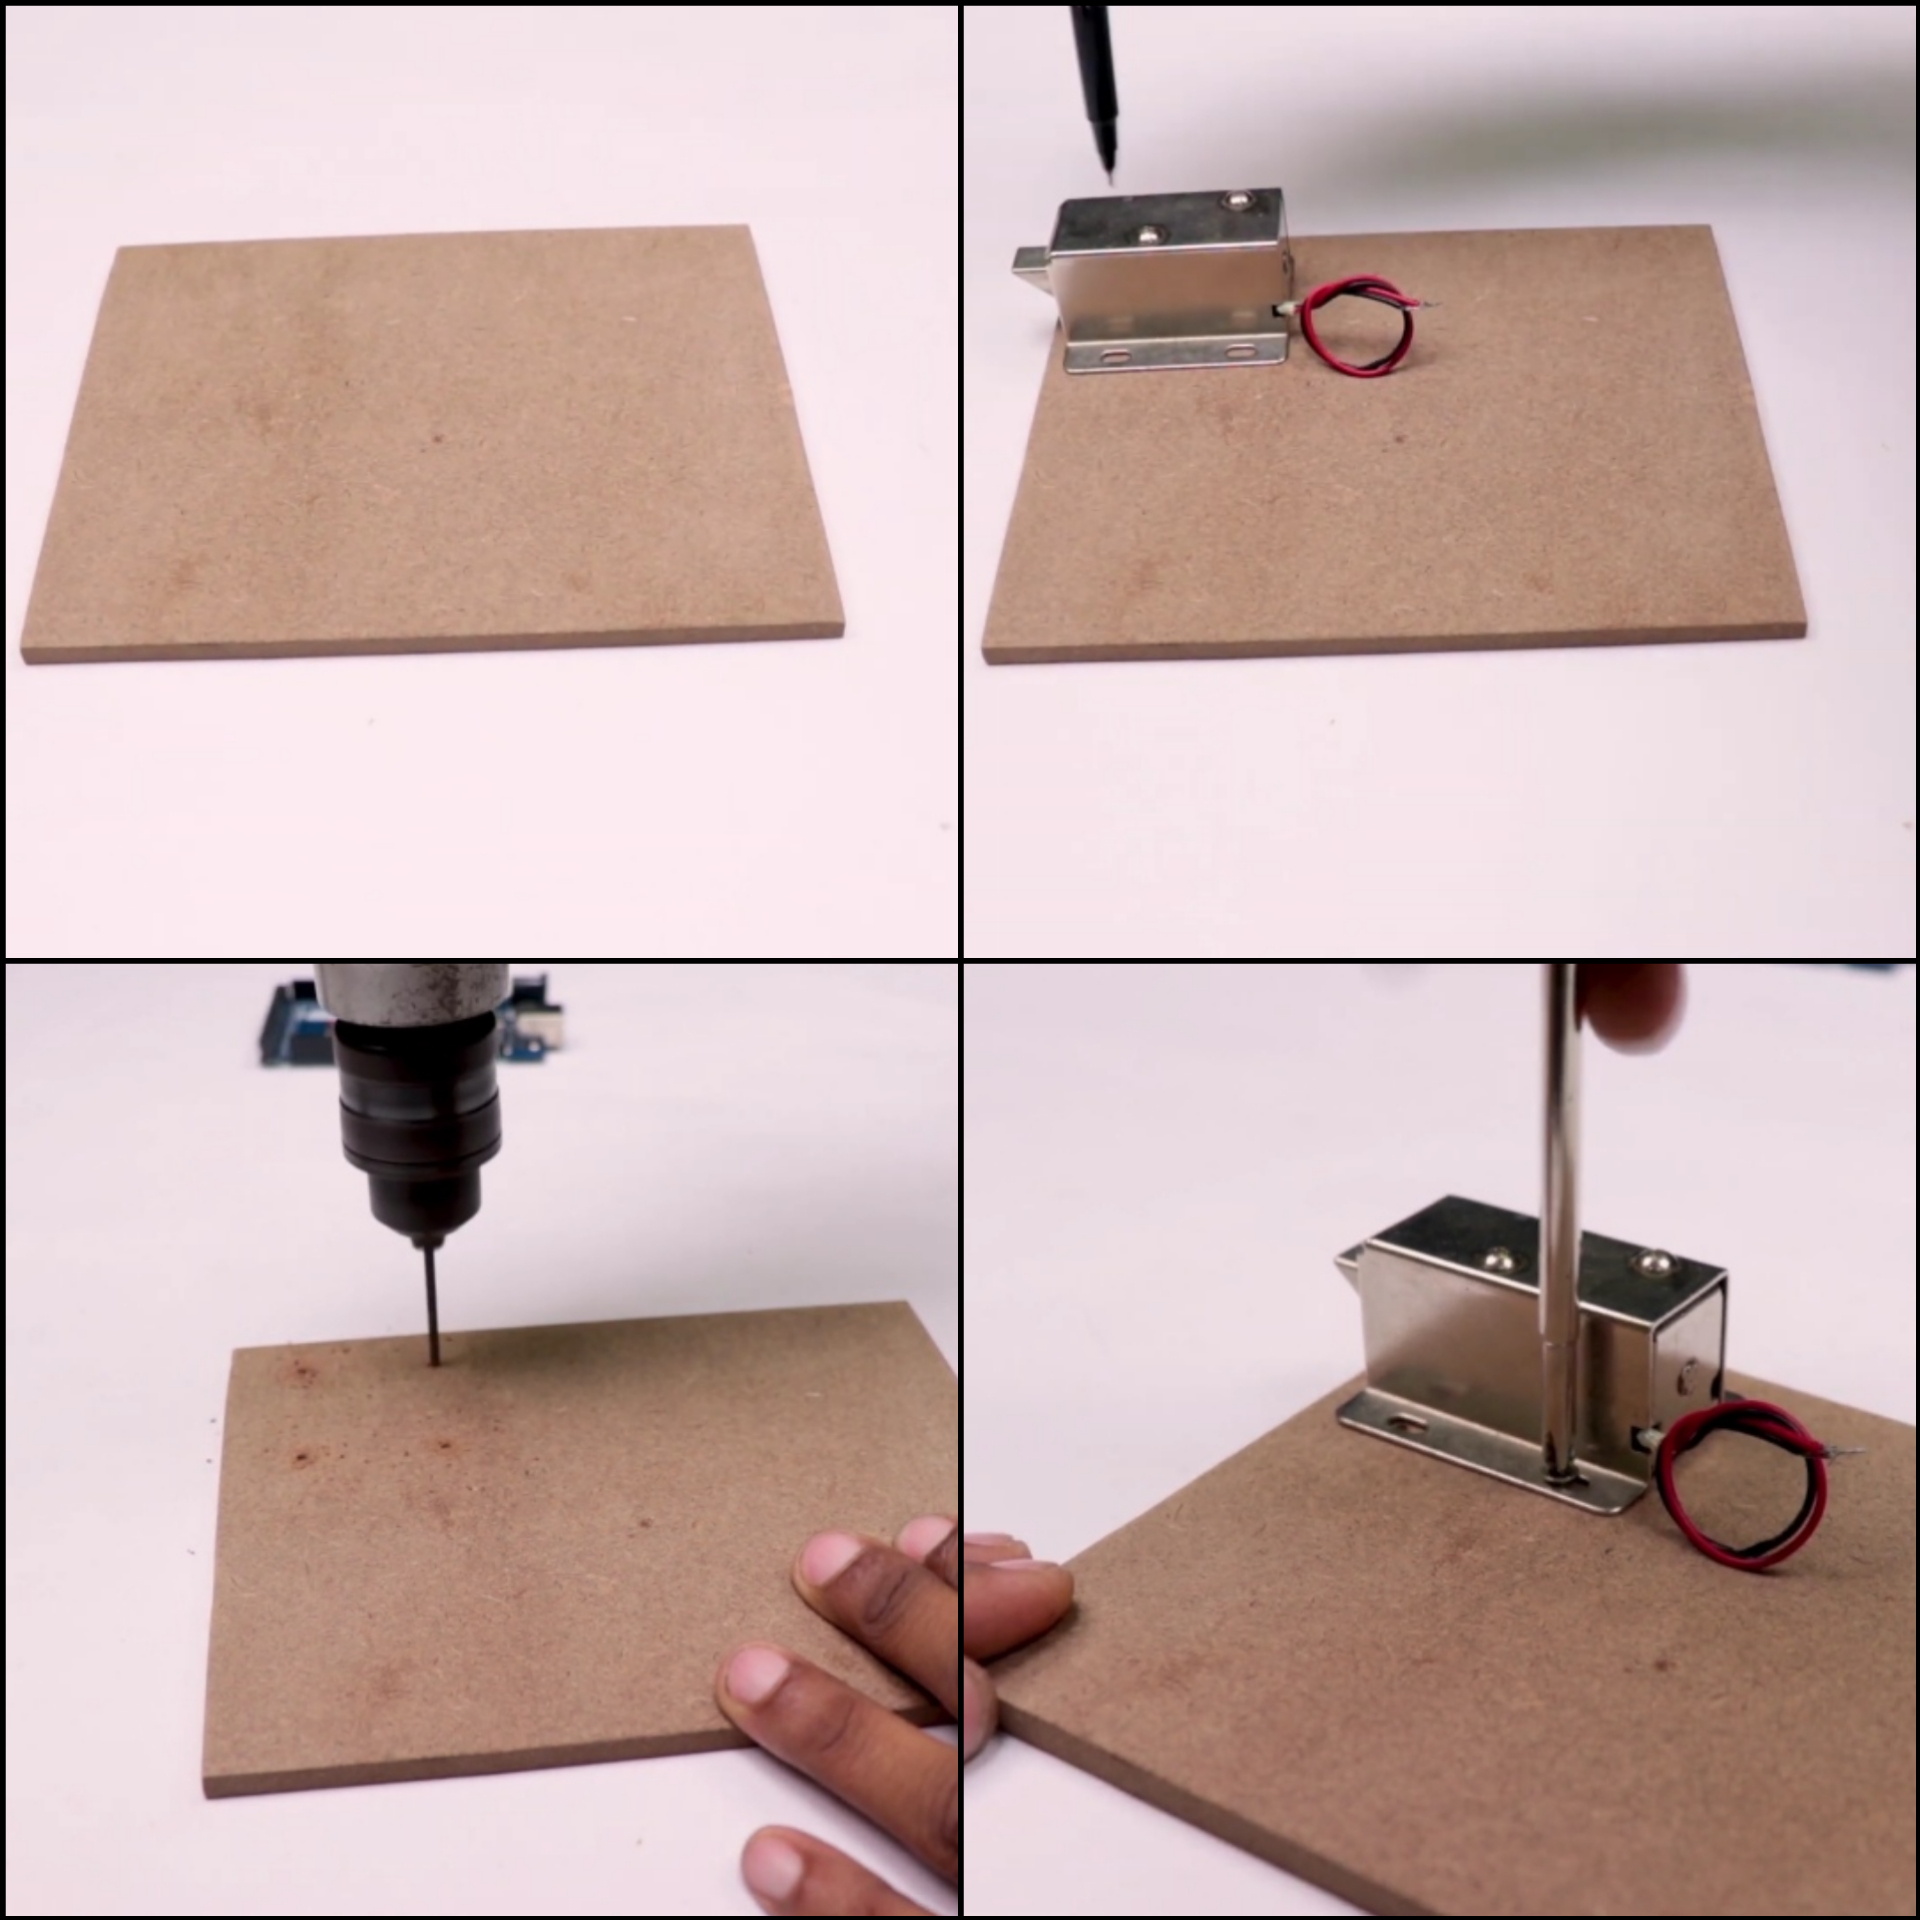
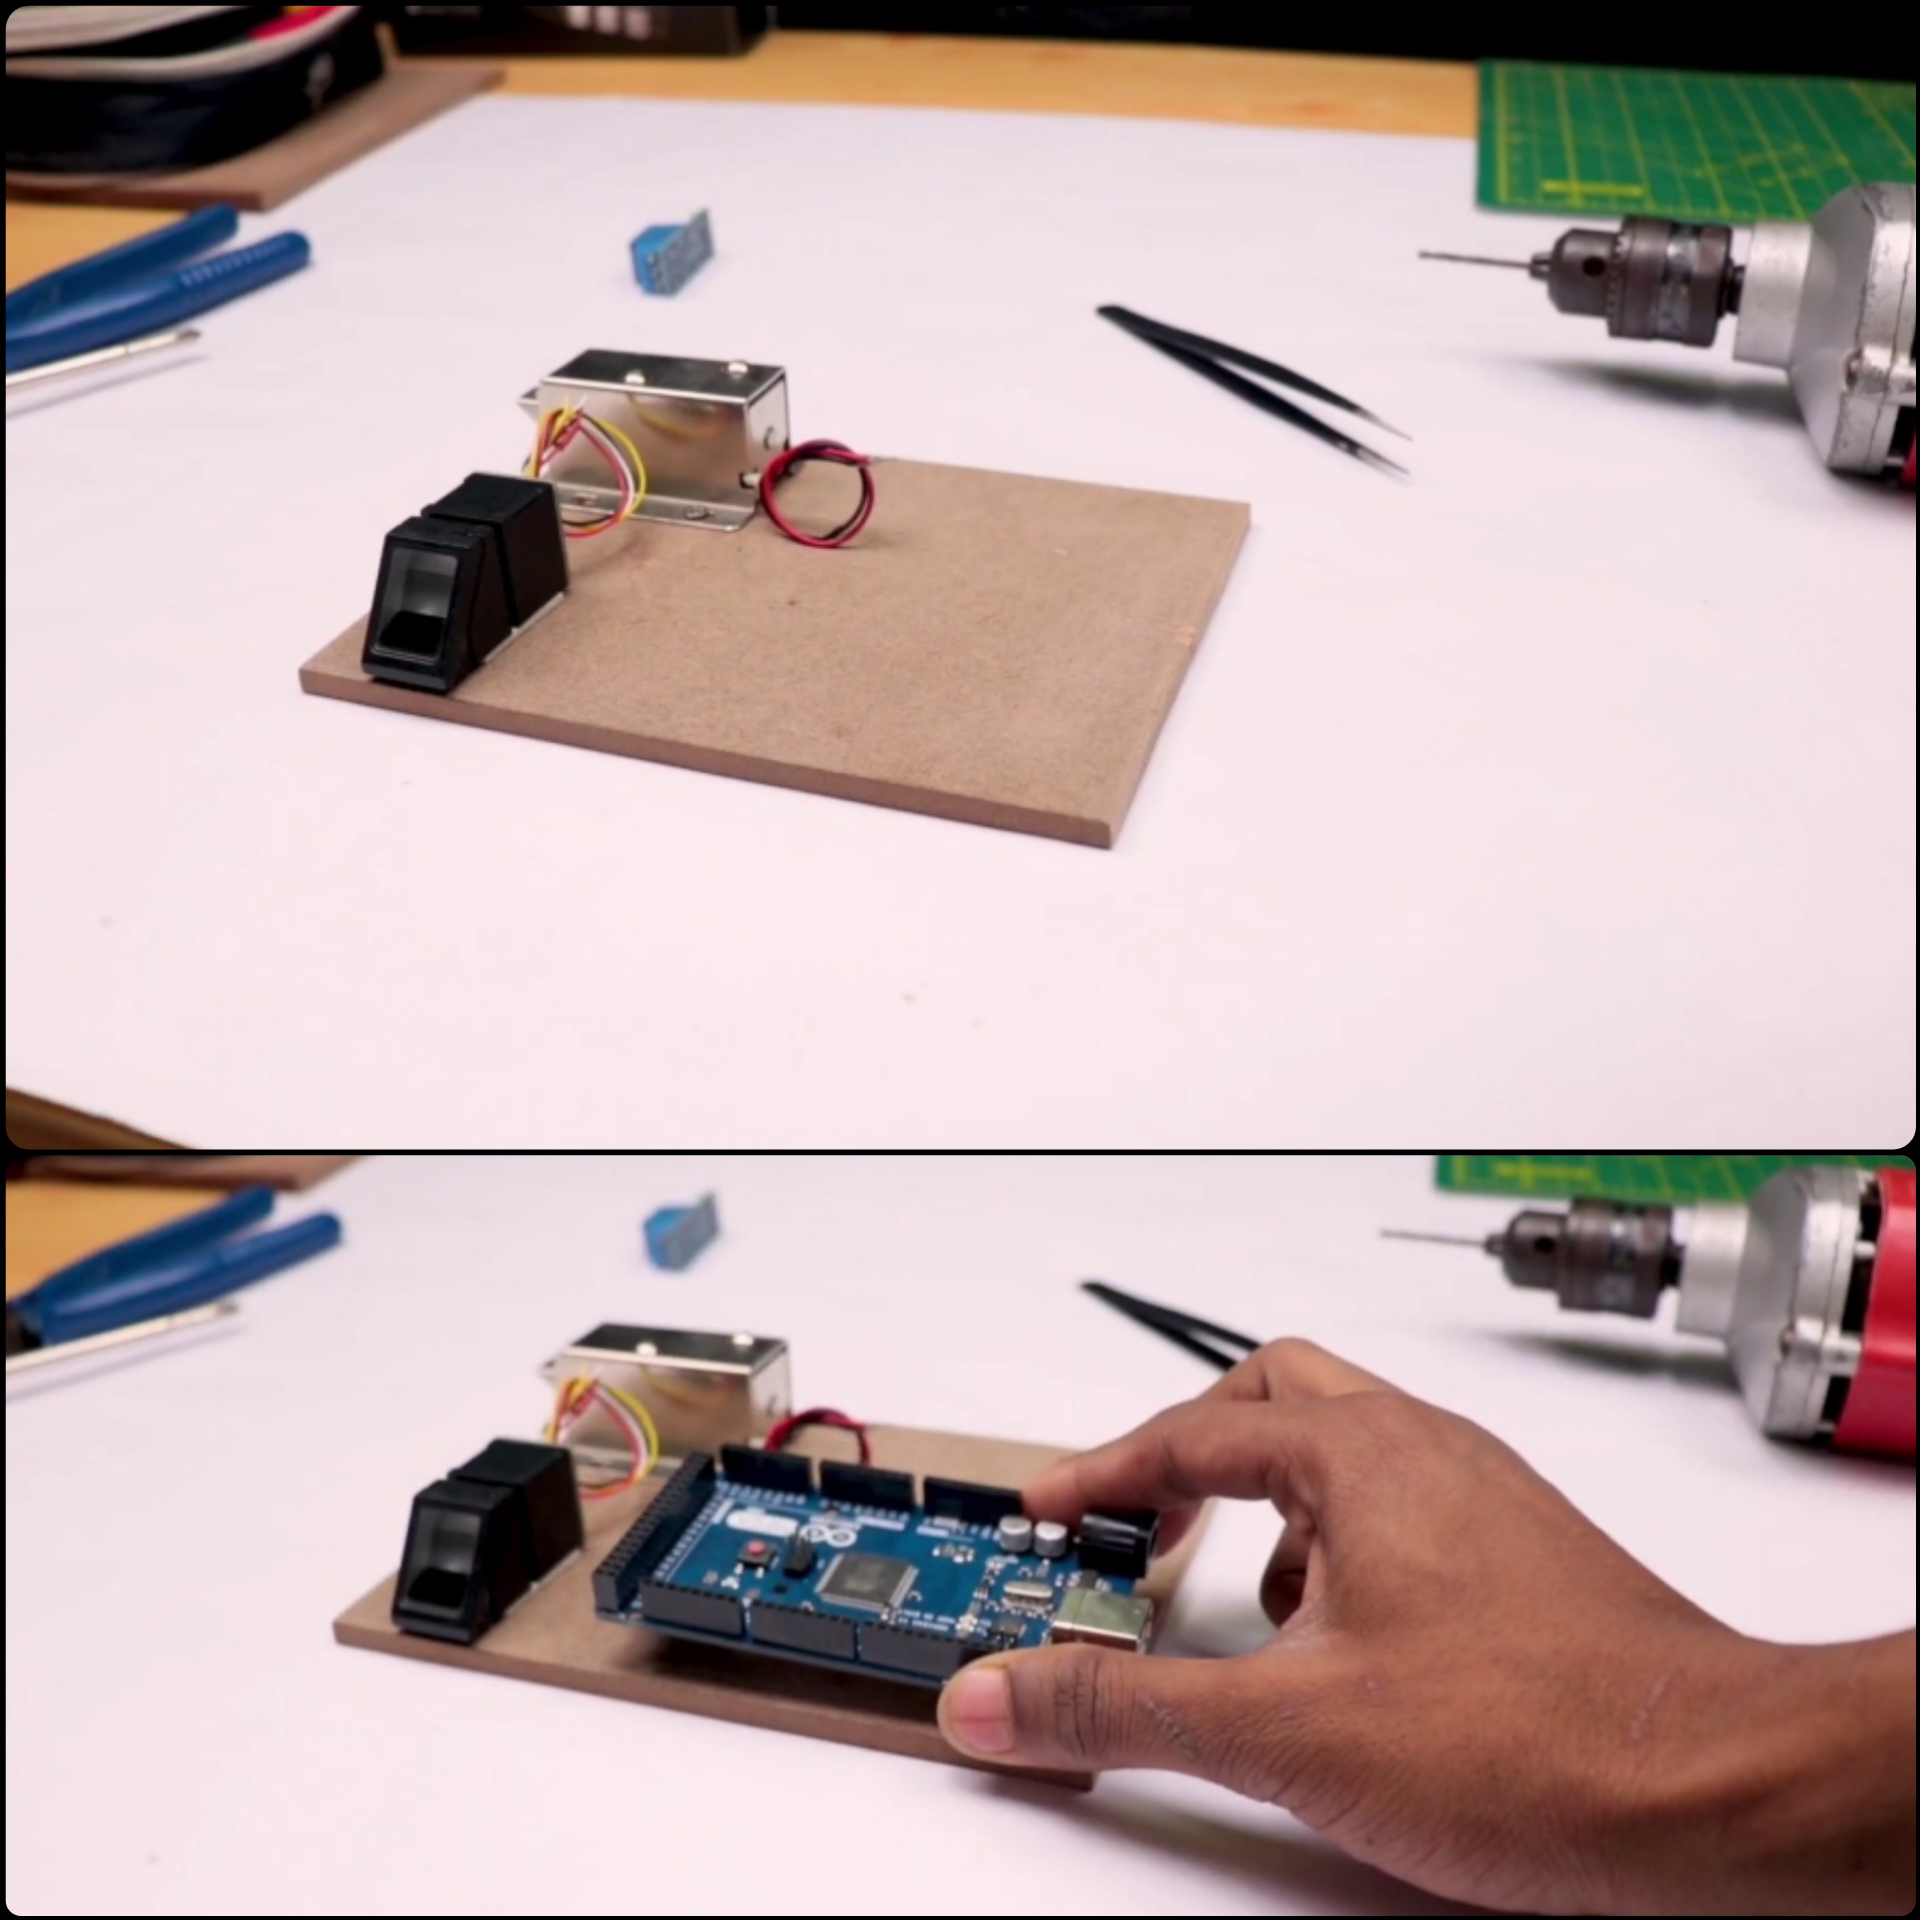
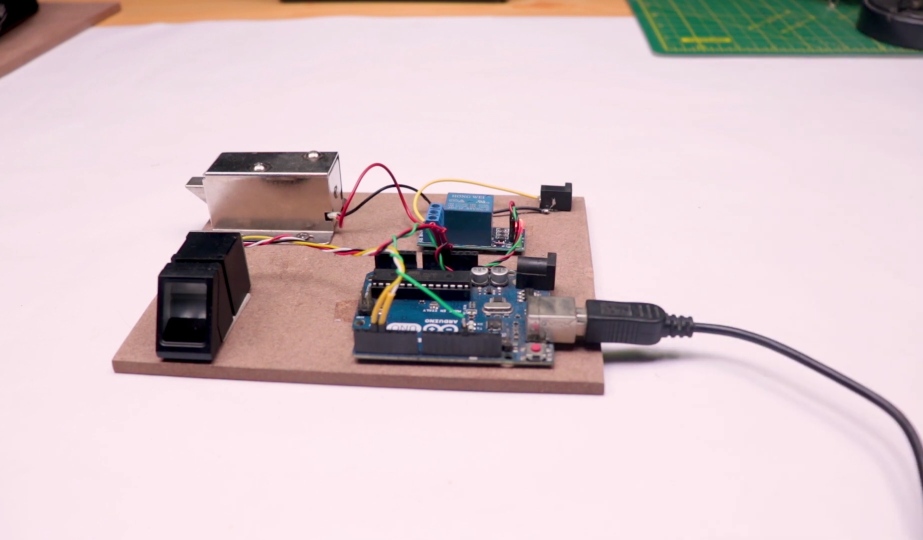
I am using MDF wood to fix it all the components on it
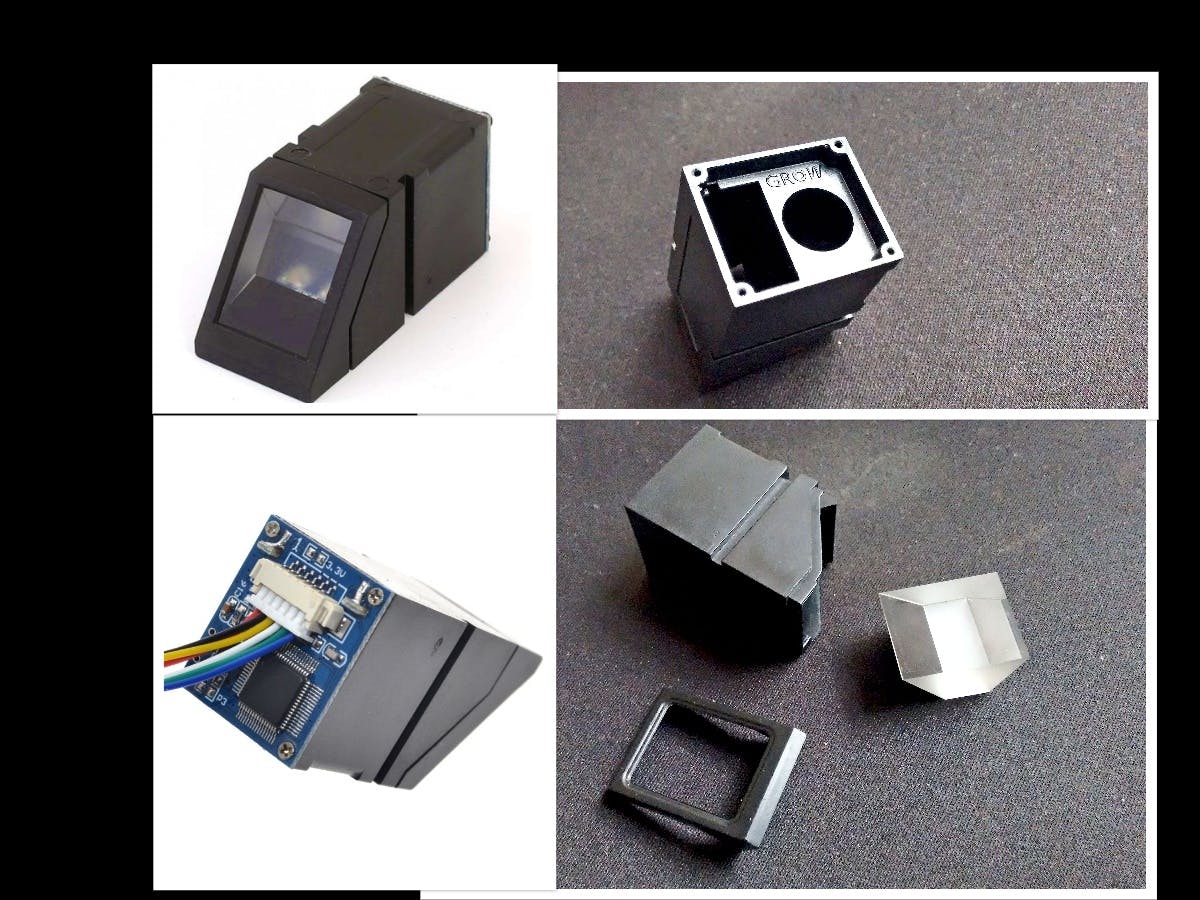
Understanding the R307 Fingerprint Sensor
The R307 sensor is a versatile optical reader that captures and verifies fingerprints via serial communication. Here’s why it’s perfect for this project:
- Storage Capacity: Stores up to 162 fingerprints.
- Baud Rate: Default 57600 (configurable).
- Security Levels: 5 adjustable sensitivity settings.
- Compatibility: Works seamlessly with Arduino.

The device has the capacity to store up to 162 fingerprints in its internal FLASH memory. The device’s LED lights up every time it is taking pictures for fingerprints.
- -Model: r307 Supply voltage: 5V
- -Operation current: 100mA-150mA
- – Fingerprint parity mode: 1: 1 1: n
- -Baud rate: 9600 * NN = 1 to 12 (Default is 6)
- -Acquisition time less than 1 second
- -5 Security levels
- -Window dimension: 14x18mm
- -Working environment: -10 º c to 40 º c (Relative Humidity 40% to 85%)
- -Dimensions: 5.5 x 2.1 x 2.0 cm Weight: 22g
To be able to use the device, it is necessary to save the fingerprints in its database. These footprints are assigned an ID. Subsequently, the reading and comparison sequence can be started to verify the fingerprints of the users and thus be able to discern and execute actions based on the result.
Inside the R307: An optical prism, image sensor, and touch-sensitive pad ensure quick scans.
_a0YH3a7Jju.jpg?auto=compress%2Cformat&w=1280&h=960&fit=max)
Image sensor
_fMKeylHicQ.jpg?auto=compress%2Cformat&w=1280&h=960&fit=max)
Step 1: Hardware Setup
Mounting Components
- Base Construction: Use MDF wood to create a platform for the Arduino, sensor, and lock.
- Positioning: Secure the solenoid lock near the latch mechanism and mount the sensor for easy access.
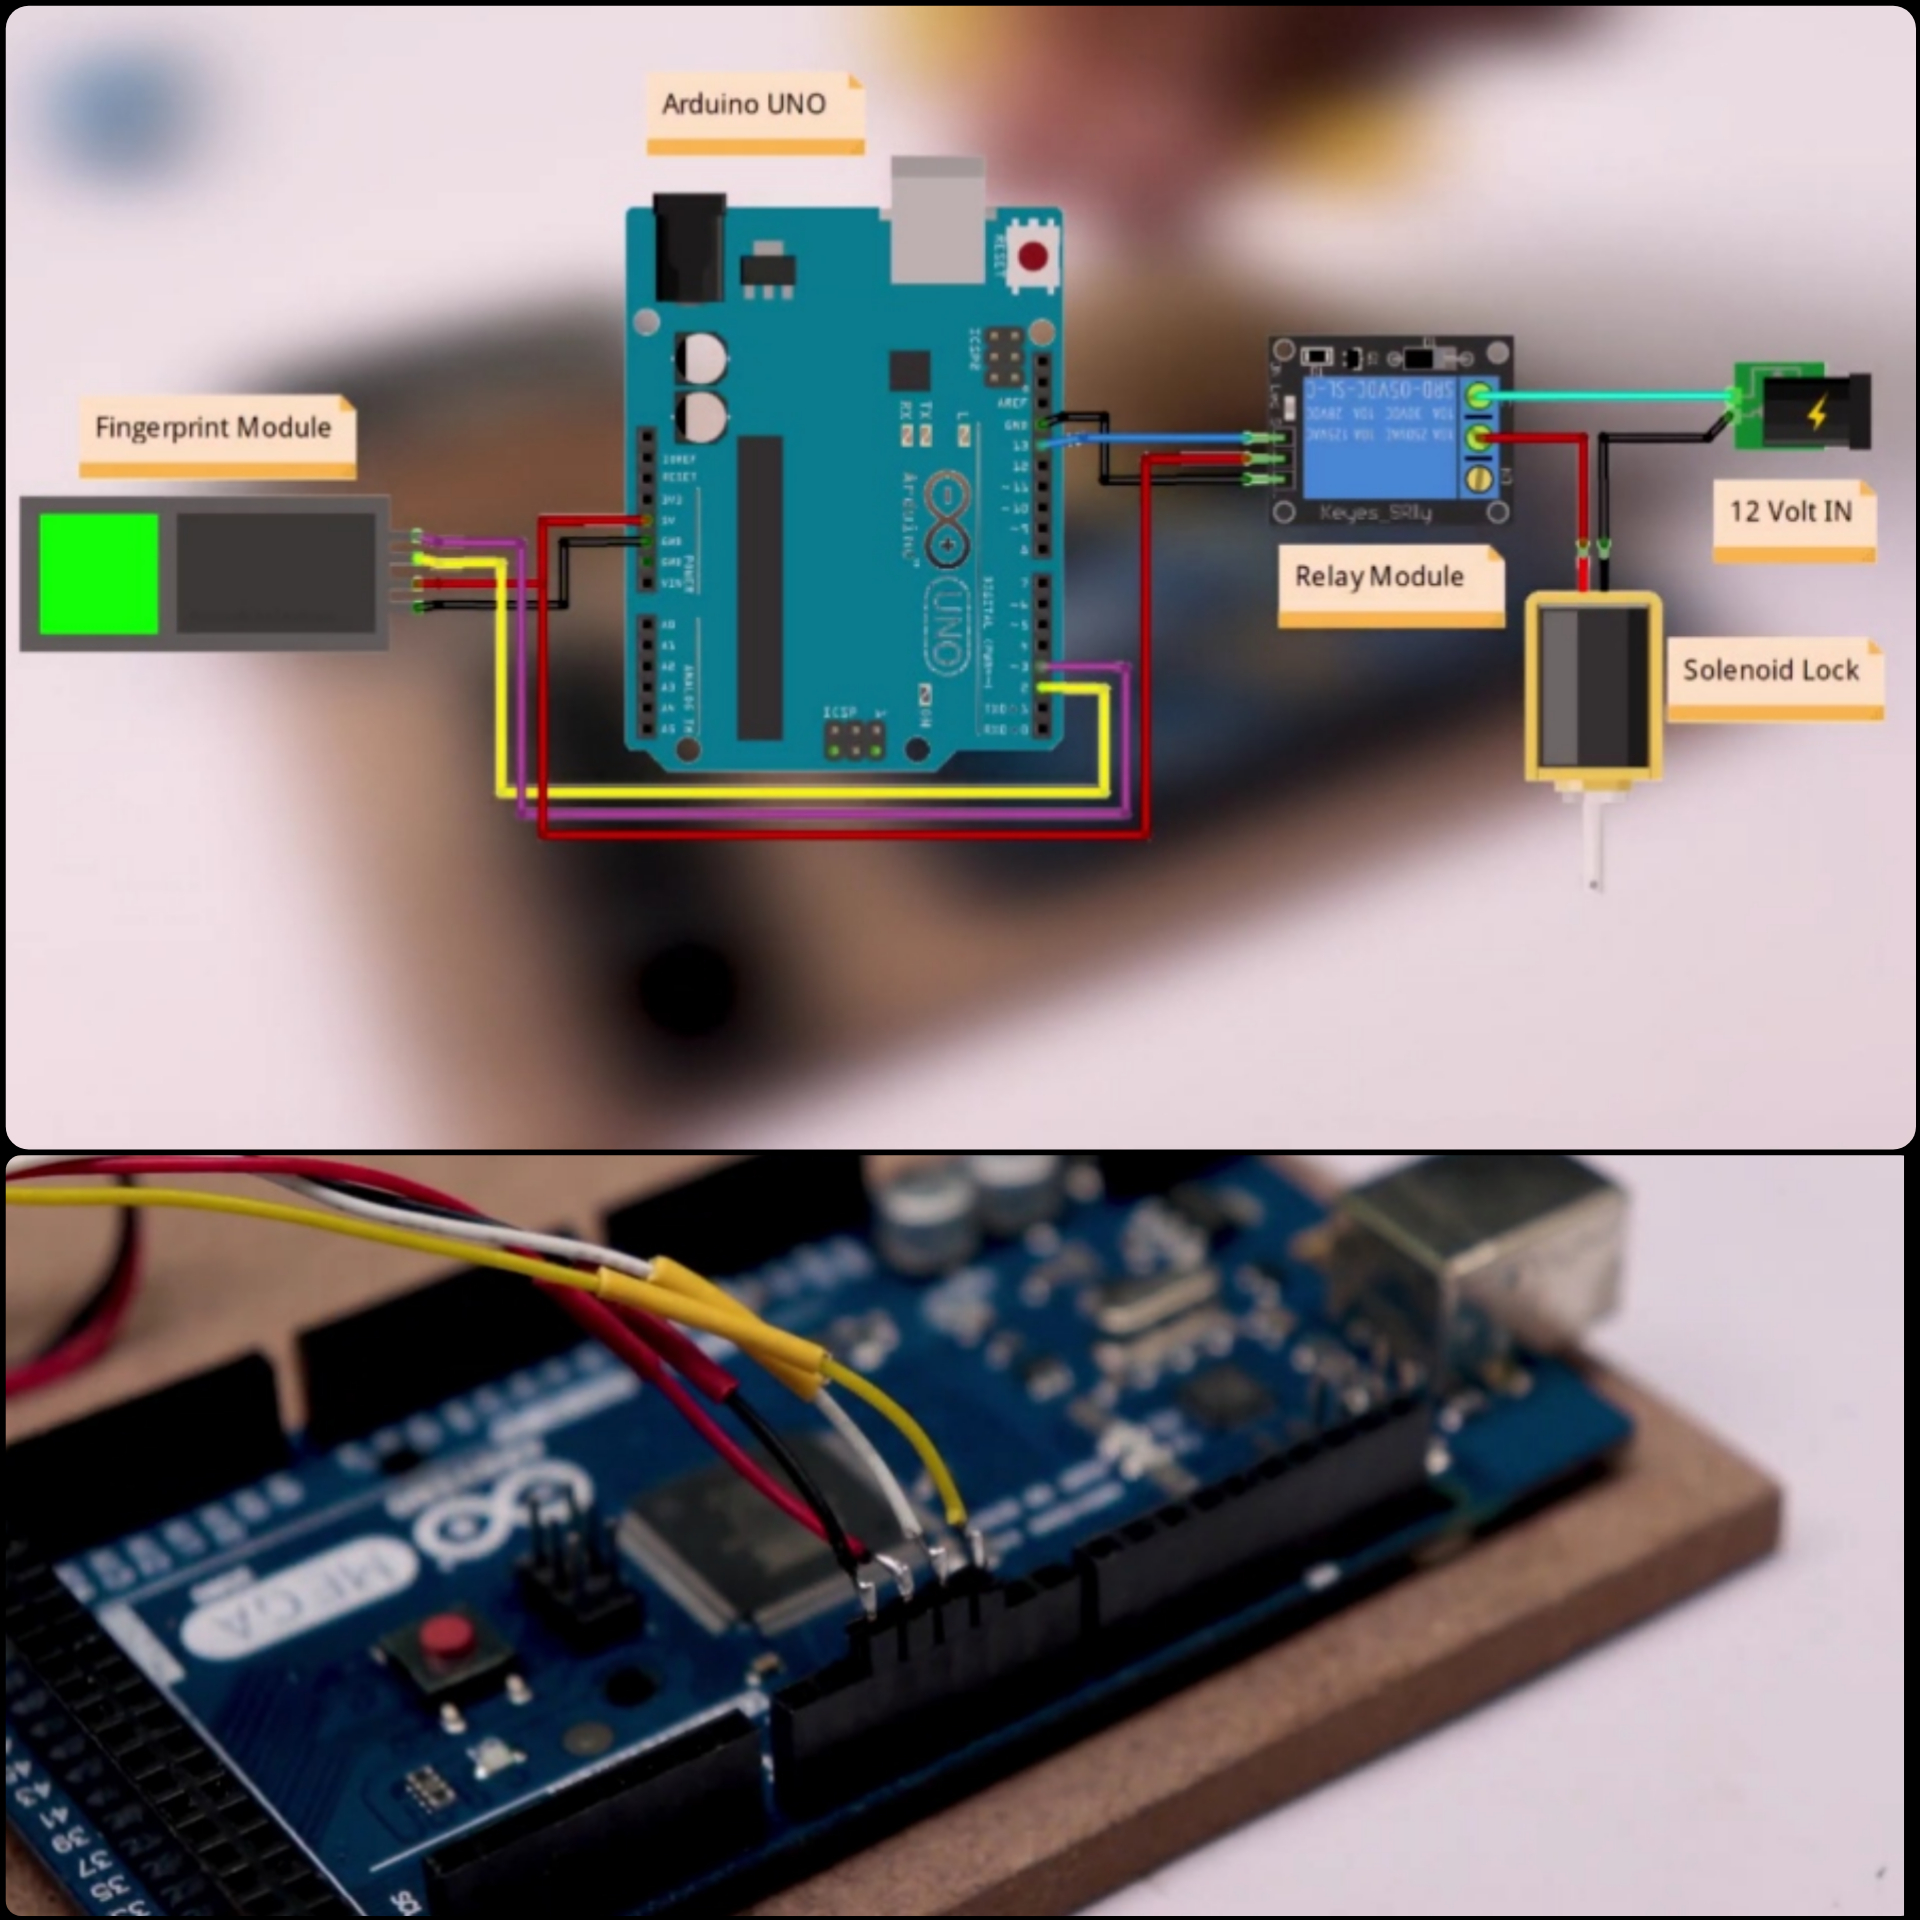
Schematic & circuit
Pro Tip: Label wires to avoid confusion during connections.
Circuit Wiring
Connect components as follows:
| Arduino | Fingerprint Sensor |
|---|---|
| Digital Pin 2 (RX) | TX |
| Digital Pin 3 (TX) | RX |
| 5V | VCC |
| GND | GND |
Solenoid Lock: Connect to the relay module, which is wired to Arduino’s Pin 13.
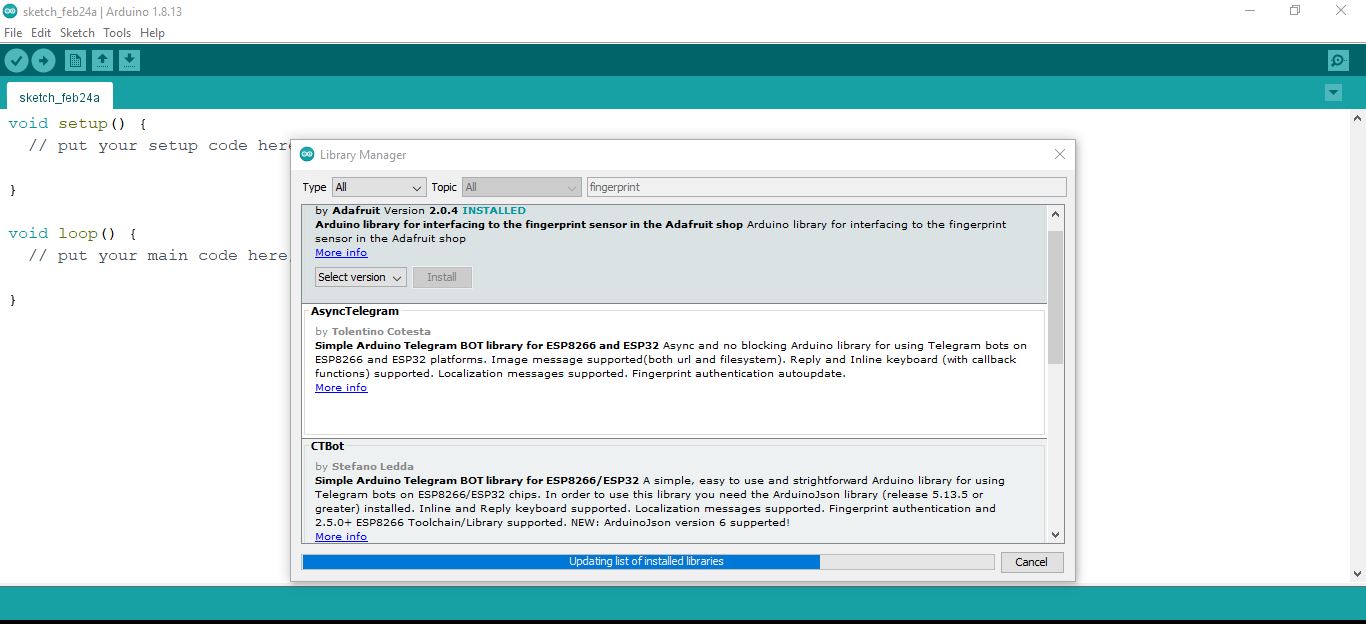
 Step 2: Install the Fingerprint Library
- Download the Adafruit Fingerprint Sensor Library.
- Extract the ZIP file into Arduino’s
librariesfolder. - Rename the folder to
Adafruit_Fingerprintif needed.
Once downloaded, the library is unzipped and saved in: C: Program Files (x86) Arduino libraries It is necessary to rename the library folder in case the “.cpp” file is found with a different name is in it.
Upload the Fingerprint Registration Code
Below is the Arduino code to register fingerprints. Copy and paste it into your Arduino IDE.
1 2 3 4 5 6 7 8 9 10 11 12 13 14 15 16 17 18 19 20 21 22 23 24 25 26 27 28 29 30 31 32 33 34 35 36 37 38 39 40 41 42 43 44 45 46 47 48 49 50 51 52 53 54 55 56 57 58 59 60 61 62 63 64 65 66 67 68 69 70 71 72 73 74 75 76 77 78 79 80 81 82 83 84 85 86 87 88 89 90 91 92 93 94 95 96 97 98 99 100 101 102 103 104 105 106 107 108 109 110 111 112 113 114 115 116 117 118 119 120 121 122 123 124 125 126 127 128 129 130 131 132 133 134 135 136 137 138 | #include <Adafruit_Fingerprint.h> #include <SoftwareSerial.h> // Create a software serial object for the fingerprint sensor SoftwareSerial mySerial(2, 3); // RX = D2, TX = D3 // Create a fingerprint sensor object Adafruit_Fingerprint finger = Adafruit_Fingerprint(&mySerial); void setup() { // Initialize serial communication Serial.begin(9600); while (!Serial); // Wait for serial port to connect (for boards with native USB) // Initialize the fingerprint sensor finger.begin(57600); // Check if the sensor is connected if (finger.verifyPassword()) { Serial.println("Found fingerprint sensor!"); } else { Serial.println("Did not find fingerprint sensor :("); while (1); // Halt if the sensor is not found } Serial.println("Ready to enroll a fingerprint!"); } void loop() { Serial.println("Send any character to start enrolling a fingerprint..."); while (!Serial.available()); // Wait for user input while (Serial.available()) Serial.read(); // Clear the serial buffer enrollFingerprint(); } // Function to enroll a new fingerprint uint8_t enrollFingerprint() { int id = 0; Serial.println("Enter ID # (from 1 to 162) to save the fingerprint..."); while (true) { while (!Serial.available()); // Wait for user input id = Serial.parseInt(); // Read the ID number if (id > 0 && id <= 162) break; // Ensure the ID is valid Serial.println("Invalid ID. Please enter a number between 1 and 162."); } Serial.print("Enrolling ID #"); Serial.println(id); // Step 1: Get the first fingerprint image int p = -1; Serial.println("Place your finger on the sensor..."); while (p != FINGERPRINT_OK) { p = finger.getImage(); switch (p) { case FINGERPRINT_OK: Serial.println("Image taken"); break; case FINGERPRINT_NOFINGER: Serial.println("."); break; default: Serial.println("Error. Try again."); return p; } } // Step 2: Convert the image to a template p = finger.image2Tz(1); switch (p) { case FINGERPRINT_OK: Serial.println("Image converted"); break; default: Serial.println("Error. Try again."); return p; } // Step 3: Remove the finger and get the second image Serial.println("Remove your finger..."); delay(2000); p = 0; while (p != FINGERPRINT_NOFINGER) { p = finger.getImage(); } Serial.println("Place the same finger again..."); p = -1; while (p != FINGERPRINT_OK) { p = finger.getImage(); switch (p) { case FINGERPRINT_OK: Serial.println("Image taken"); break; case FINGERPRINT_NOFINGER: Serial.println("."); break; default: Serial.println("Error. Try again."); return p; } } // Step 4: Convert the second image to a template p = finger.image2Tz(2); switch (p) { case FINGERPRINT_OK: Serial.println("Image converted"); break; default: Serial.println("Error. Try again."); return p; } // Step 5: Create a fingerprint model Serial.println("Creating model..."); p = finger.createModel(); if (p == FINGERPRINT_OK) { Serial.println("Prints matched!"); } else { Serial.println("Fingerprints did not match. Try again."); return p; } // Step 6: Store the model in the sensor's memory Serial.print("Storing model at ID #"); Serial.println(id); p = finger.storeModel(id); if (p == FINGERPRINT_OK) { Serial.println("Fingerprint enrolled successfully!"); } else { Serial.println("Error storing fingerprint."); return p; } return true; } |
We open the Arduino Serial Monitor to start recording the tracks and follow the instructions:
We save the first fingerprint in position 1 and then we give it enter and follow the instructions:

If the fingerprint was registered correctly, it will show the message “Fingerprint DOES match!” , followed by the position where it was saved and the message “Registered!”
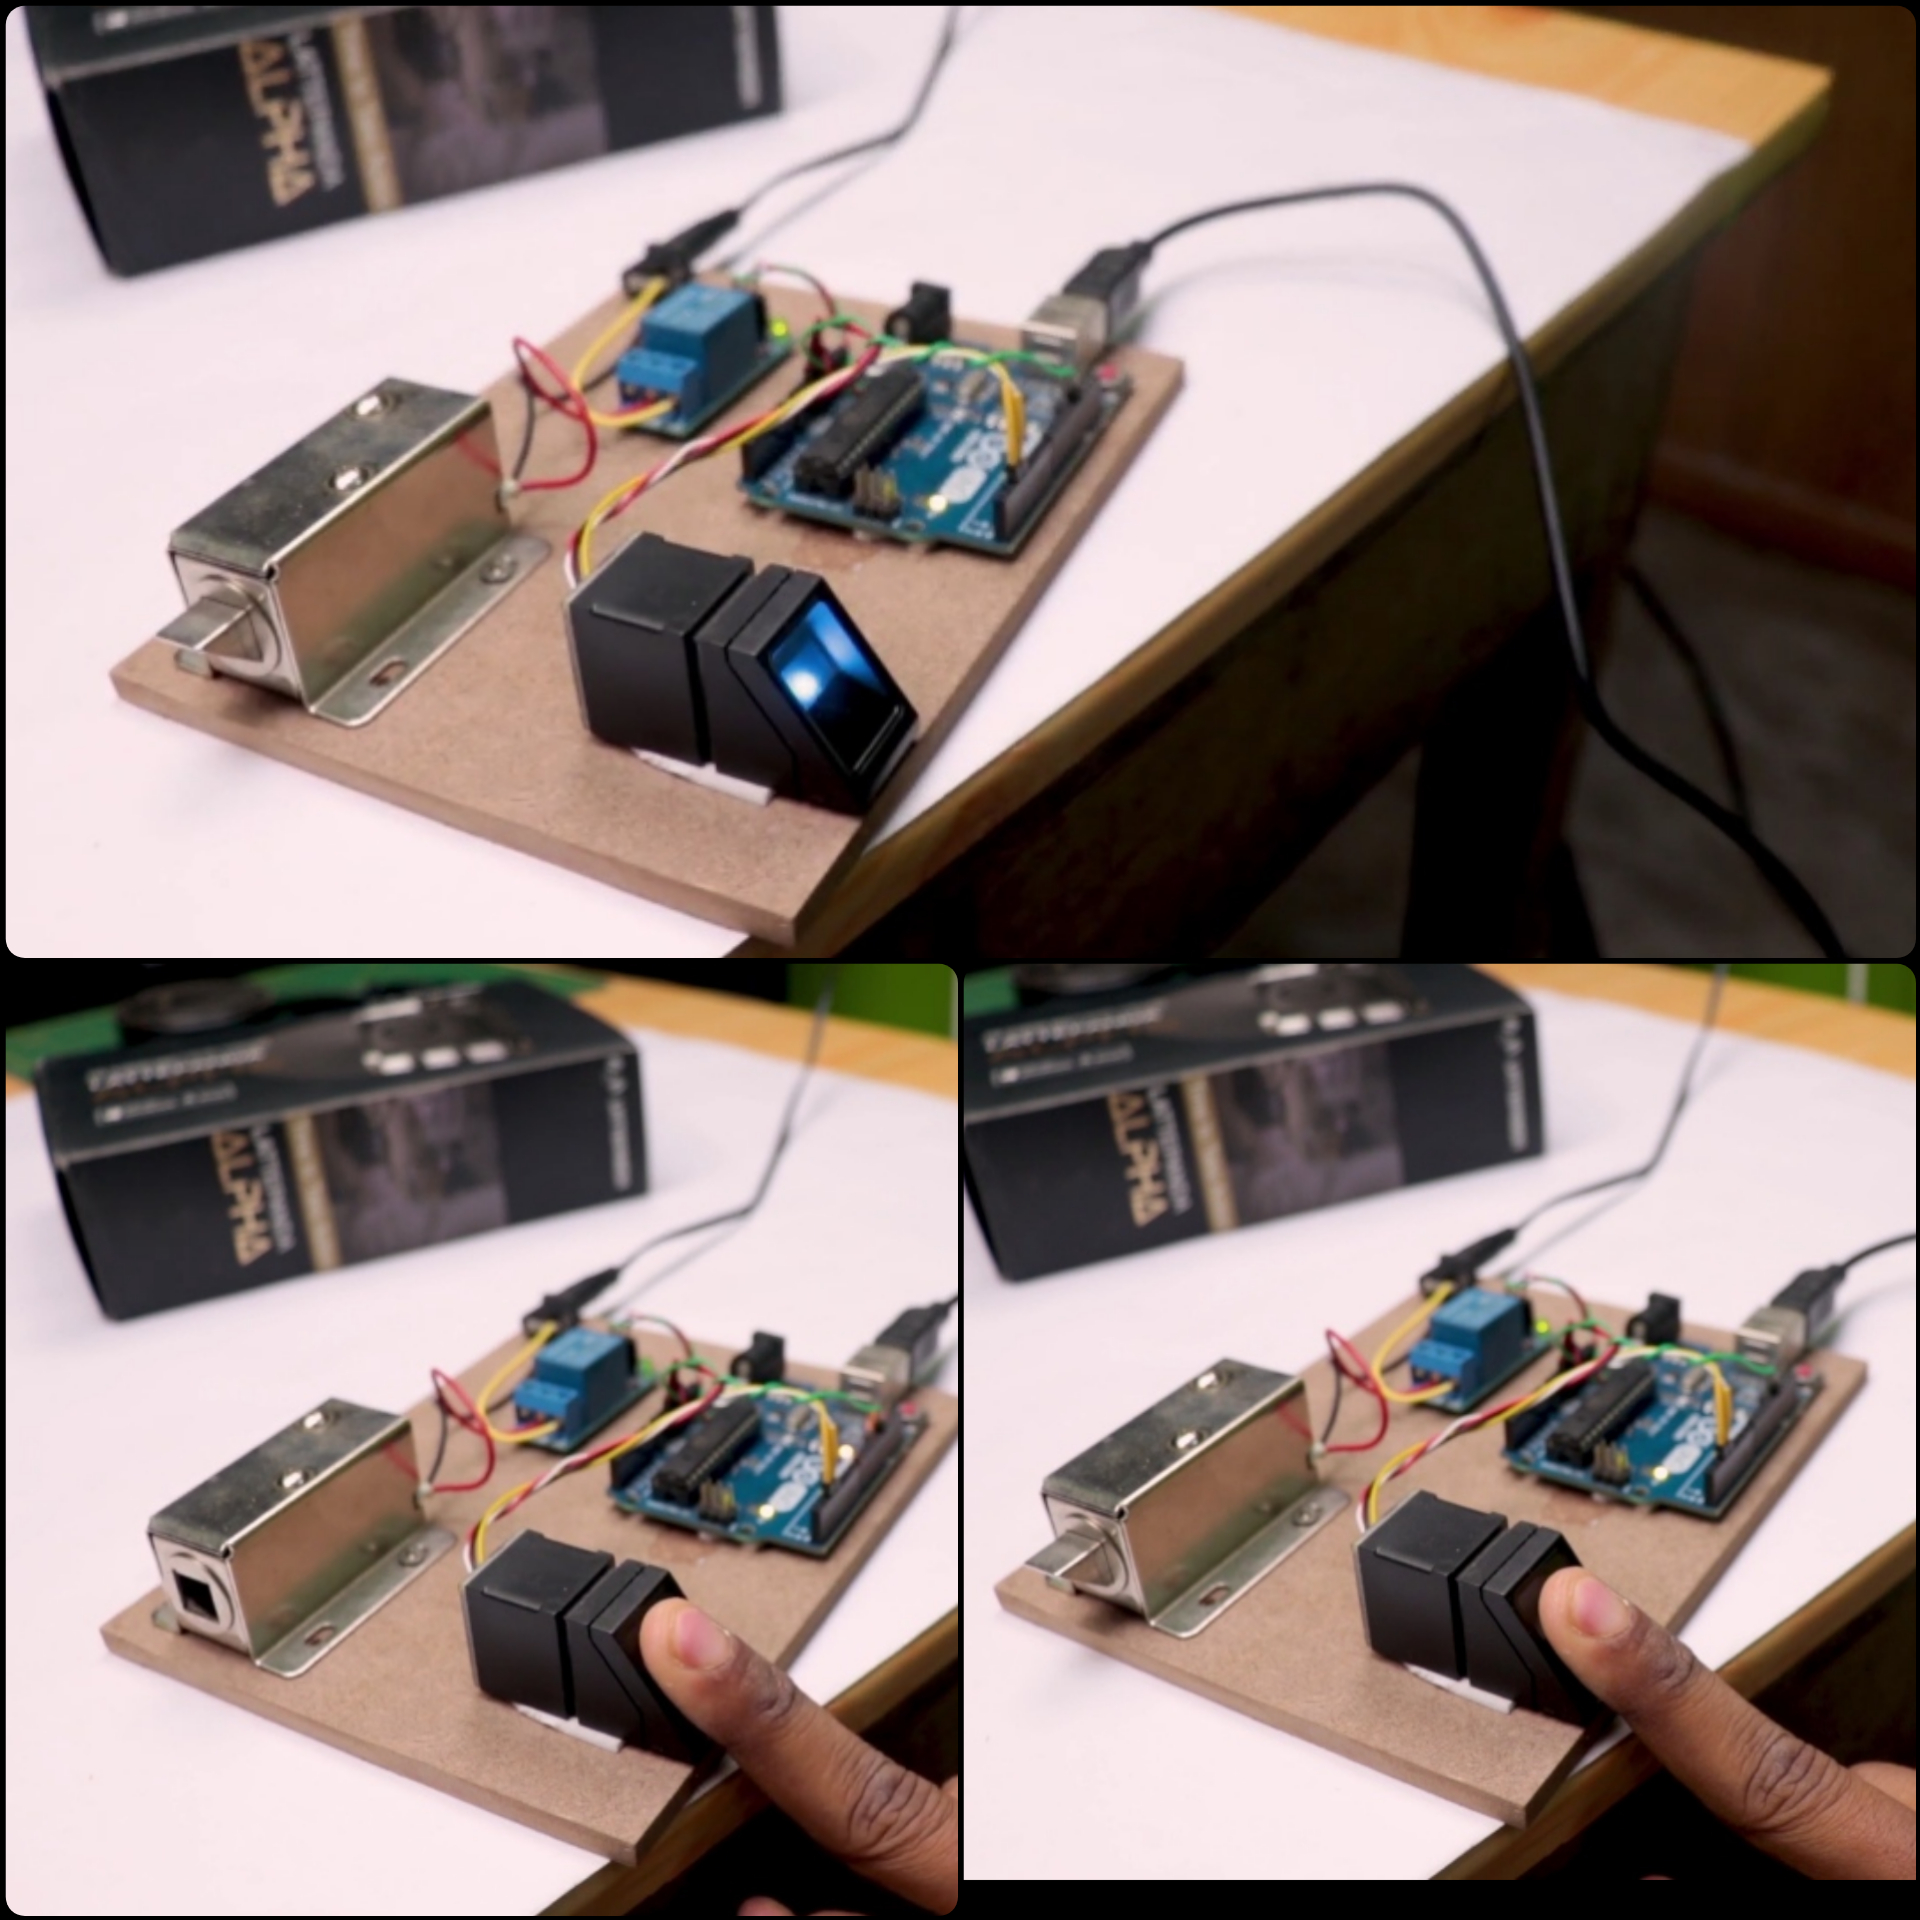
Step 4: Enroll Fingerprints
- Upload the code to your Arduino.
- Open the Serial Monitor (
Tools > Serial Monitor). - Follow the on-screen instructions:
- Enter an ID number (1 to 162) to save the fingerprint.
- Place your finger on the sensor twice to capture and verify the fingerprint.
- If successful, the sensor will store the fingerprint and confirm the enrollment.
To save more than one fingerprint, the sensor allows up to 162 fingerprints, we now retype the number of the next position where we want to save it, which in this example would be position 2 , we type 2 and press enter and continue again the same instructions until all the necessary footprints are recorded, always indicating a different position so that one already saved is not overwritten.
Finally we load the final program that will read the fingerprints. If the fingerprint read matches one of those stored, the relay that is connected to Pin 13 of the Arduino will be activated for 3 seconds
Code
1 2 3 4 5 6 7 8 9 10 11 12 13 14 15 16 17 18 19 20 21 22 23 24 25 26 27 28 29 30 31 32 33 34 35 36 37 38 39 40 41 42 43 44 45 46 47 48 49 50 51 52 53 54 55 56 57 58 59 60 61 62 63 64 65 66 67 68 69 70 71 72 73 74 75 76 77 78 79 80 81 82 83 84 85 86 87 88 89 90 91 92 93 94 95 96 97 98 99 100 101 102 | #include <Adafruit_Fingerprint.h> #include <SoftwareSerial.h> SoftwareSerial mySerial(2, 3); Adafruit_Fingerprint finger = Adafruit_Fingerprint(&mySerial); void setup() { Serial.begin(9600); pinMode(13, OUTPUT); digitalWrite(13, LOW); finger.begin(57600); if (finger.verifyPassword()) { Serial.println("Found fingerprint sensor!"); } else { Serial.println("Did not find fingerprint sensor :("); while (1); } Serial.println("Waiting for valid finger..."); } void loop() { getFingerprintIDez(); delay(50); } uint8_t getFingerprintID() { uint8_t p = finger.getImage(); switch (p) { case FINGERPRINT_OK: Serial.println("Image taken"); break; case FINGERPRINT_NOFINGER: Serial.println("No finger detected"); return p; case FINGERPRINT_PACKETRECIEVEERR: Serial.println("Communication error"); return p; case FINGERPRINT_IMAGEFAIL: Serial.println("Imaging error"); return p; default: Serial.println("Unknown error"); return p; } p = finger.image2Tz(); switch (p) { case FINGERPRINT_OK: Serial.println("Image converted"); break; case FINGERPRINT_IMAGEMESS: Serial.println("Image too messy"); return p; case FINGERPRINT_PACKETRECIEVEERR: Serial.println("Communication error"); return p; case FINGERPRINT_FEATUREFAIL: Serial.println("Could not find fingerprint features"); return p; case FINGERPRINT_INVALIDIMAGE: Serial.println("Could not find fingerprint features"); return p; default: Serial.println("Unknown error"); return p; } p = finger.fingerFastSearch(); if (p == FINGERPRINT_OK) { Serial.println("Found a print match!"); } else if (p == FINGERPRINT_PACKETRECIEVEERR) { Serial.println("Communication error"); return p; } else if (p == FINGERPRINT_NOTFOUND) { Serial.println("Did not find a match"); return p; } else { Serial.println("Unknown error"); return p; } Serial.print("Found ID #"); Serial.print(finger.fingerID); Serial.print(" with confidence of "); Serial.println(finger.confidence); return finger.fingerID; } int getFingerprintIDez() { uint8_t p = finger.getImage(); if (p != FINGERPRINT_OK) return -1; p = finger.image2Tz(); if (p != FINGERPRINT_OK) return -1; p = finger.fingerFastSearch(); if (p != FINGERPRINT_OK) return -1; Serial.print("Found ID #"); Serial.print(finger.fingerID); Serial.print(" with confidence of "); Serial.println(finger.confidence); digitalWrite(13, HIGH); delay(3000); digitalWrite(13, LOW); return finger.fingerID; } |
")


2 Comments
This is my first time I have visited here. I found a lot of interesting stuff in your blog. From the tons of comments on your posts, I guess I am not the only one! keep up the impressive work.
Hi my name Romeo, I am very happy that you liked my post, I will try and keep bringing even better projects for you and you guys keep supporting us. Thank You